
DaVinci Resolve is one of the best free video editors there is, but its automatic subtitle feature, Create Subtitles from Audio, is reserved for the paid Studio edition. The good news is that everything else about subtitles works in the free version: importing a subtitle file, editing the lines, styling them and exporting. So the workaround is simple: make the SRT file outside Resolve and bring it in.
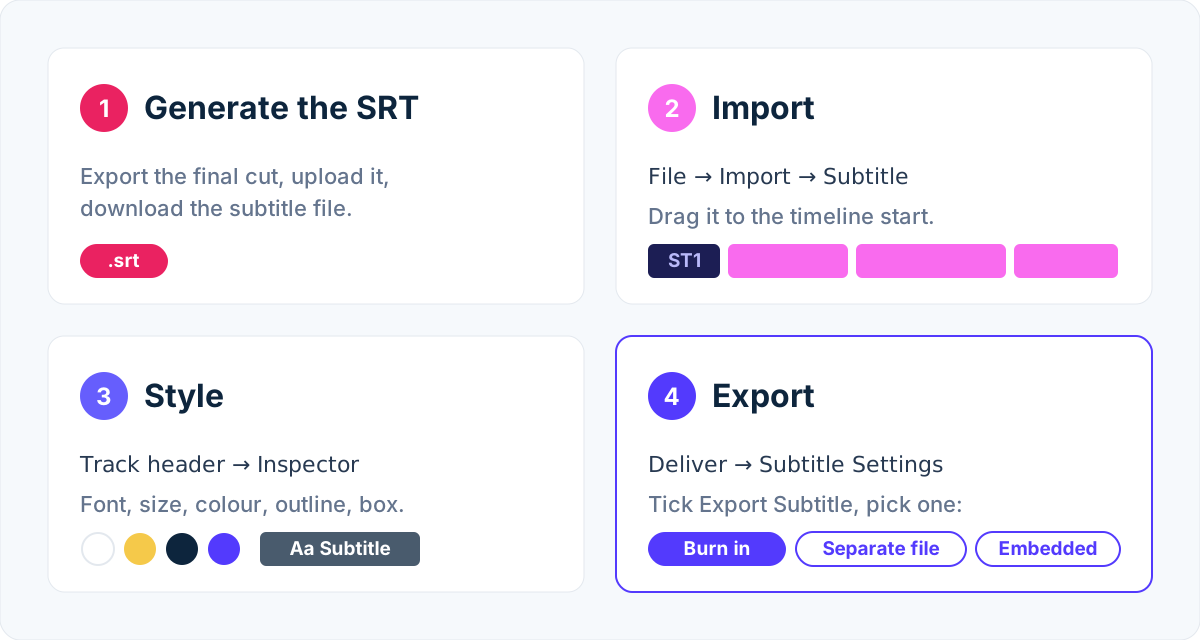
Step 1: get an SRT file of your video
Export your edit from Resolve first (or just its audio), so the subtitles match the final cut. Then generate the subtitles:
- Sign up for a free ToneLark account.
- Upload the exported video or audio file.
- Wait for the email, then download the SRT.
- Open it in a text editor and fix any names or rare words.
Each month includes 10 free minutes, which covers most short videos. If you are making the file another way, the format is plain text:
1
00:00:00,800 --> 00:00:03,200
Hi, and welcome back to the channel.
Step 2: import the SRT into DaVinci Resolve
- Open your project on the Edit page.
- Choose File → Import → Subtitle and pick the
.srtfile. It appears in the Media Pool. (Dragging the file into the Media Pool works too.) - Drag the subtitle clip from the Media Pool onto the timeline, at the very start. Resolve creates a subtitle track, labelled ST1, above the video tracks.
- Play a few seconds to check the lines appear with the speech.
If the subtitles start late or early, select every clip on the subtitle track and move them together until the first line matches.
Step 3: style the subtitles
Select the subtitle track header (not a single caption) and open the Inspector. On the track style tab you can set, for every line at once:
- font, size and colour
- an outline (stroke) or drop shadow for readability
- a background box behind the text
- position on screen
Readable subtitles are usually white or yellow, 5 to 7 percent of the frame height, with a dark outline or a semi-transparent box. Select a single caption to edit its text or timing.
Step 4: export with subtitles
On the Deliver page, scroll down the render settings to Subtitle Settings and tick Export Subtitle. Then choose a format:
- Burn into video. The text is drawn into the picture. Use this for Instagram, TikTok and anywhere that ignores subtitle files.
- As a separate file. Resolve writes an SRT next to the video. Use this for YouTube, Vimeo and course platforms, where viewers can switch subtitles off.
- As embedded captions. The subtitles travel inside the video file as a track, for players that support it.
Add the render to the queue and render as usual.
A faster route for social clips
If the clip goes straight to TikTok, Reels or Shorts and you do not need to edit it further, you can skip Resolve's subtitle track entirely. ToneLark can burn captions into the video itself, with the spoken word highlighted as it is said. More in captions for TikTok and Reels.
Other editors
The same SRT works in Premiere Pro, Final Cut Pro, CapCut and most other editors: import it as a caption or subtitle track, style it, export. For the full picture of ways to make subtitles, see how to make subtitles for a video.